Some school projects are mainly about surviving the deadline.
This one was better than that.
I helped my wife’s younger brother, Julian, build this project for school, and somewhere between the Arduino, the motor, the sensor readings, and the inevitable debugging, it stopped feeling like “homework” and started feeling like a real little engineering build.
That is usually a good sign.
The nice thing about projects like this is that they make technology feel real very quickly. You are not just talking about code in the abstract. You upload something, flip a wire, change a value, and suddenly a motor either spins, refuses to spin, or behaves in a way that tells you your confidence was premature. That feedback loop is annoying when you are in the middle of it, but it is also why you learn fast.
And honestly, that is what made this fun.
If you want to look at the actual project files, the code is here:
The idea was simple enough
At the center of the project was a straightforward question:
Can we control a motor from a computer, read what it is doing, and make the whole thing understandable enough that it becomes a proper learning project instead of just a pile of parts?
The answer turned into two connected pieces:
- An Arduino Uno sketch that handles the motor and sensor side
- A localhost control panel that makes it easier to test, tweak, and see what is happening
That gave Julian something much better than a static classroom exercise. He could work with real electronics, real code, and real cause and effect.
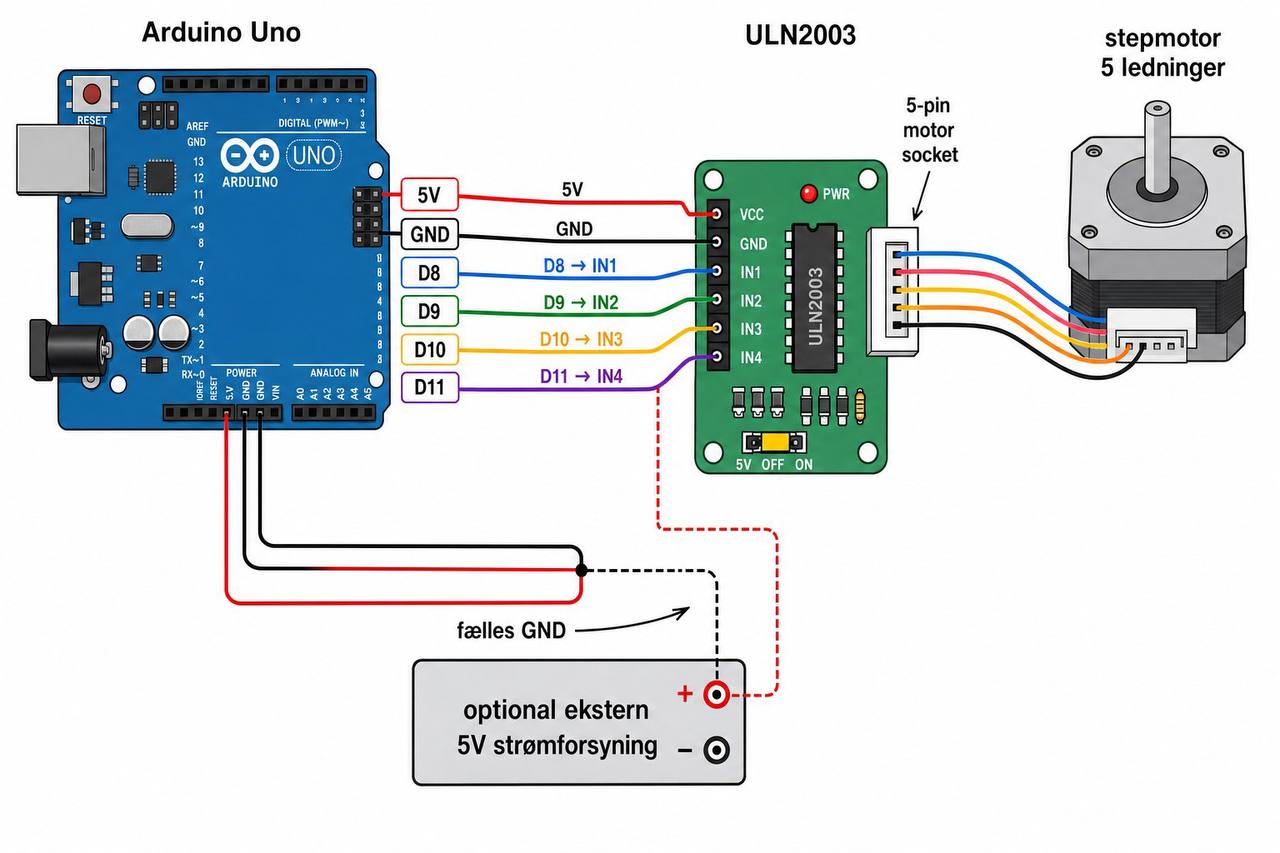
The motor power is controlled from the Arduino, the sensor reports movement back, and the computer sends commands and displays status. That sounds simple when written in one sentence, but it is exactly the kind of setup that teaches you how systems actually fit together.
What the project actually does
The Arduino code has a few jobs:
- listen for commands from the computer
- control motor output with PWM
- read pulses from the sensor
- estimate speed from those pulses
- report status back over serial
On top of that, the local interface gives you a cleaner way to work with it:
- quick PWM presets
- a live slider
- status output from the board
- a graph so you can actually see what changes when you test something
That matters more than it sounds like it should. Without that interface, projects like this tend to become a lot of stop-start friction: edit, upload, guess, repeat. With even a small control panel, the whole thing becomes much more interactive. You can try things quickly, compare behavior, and have better conversations about what the system is doing.
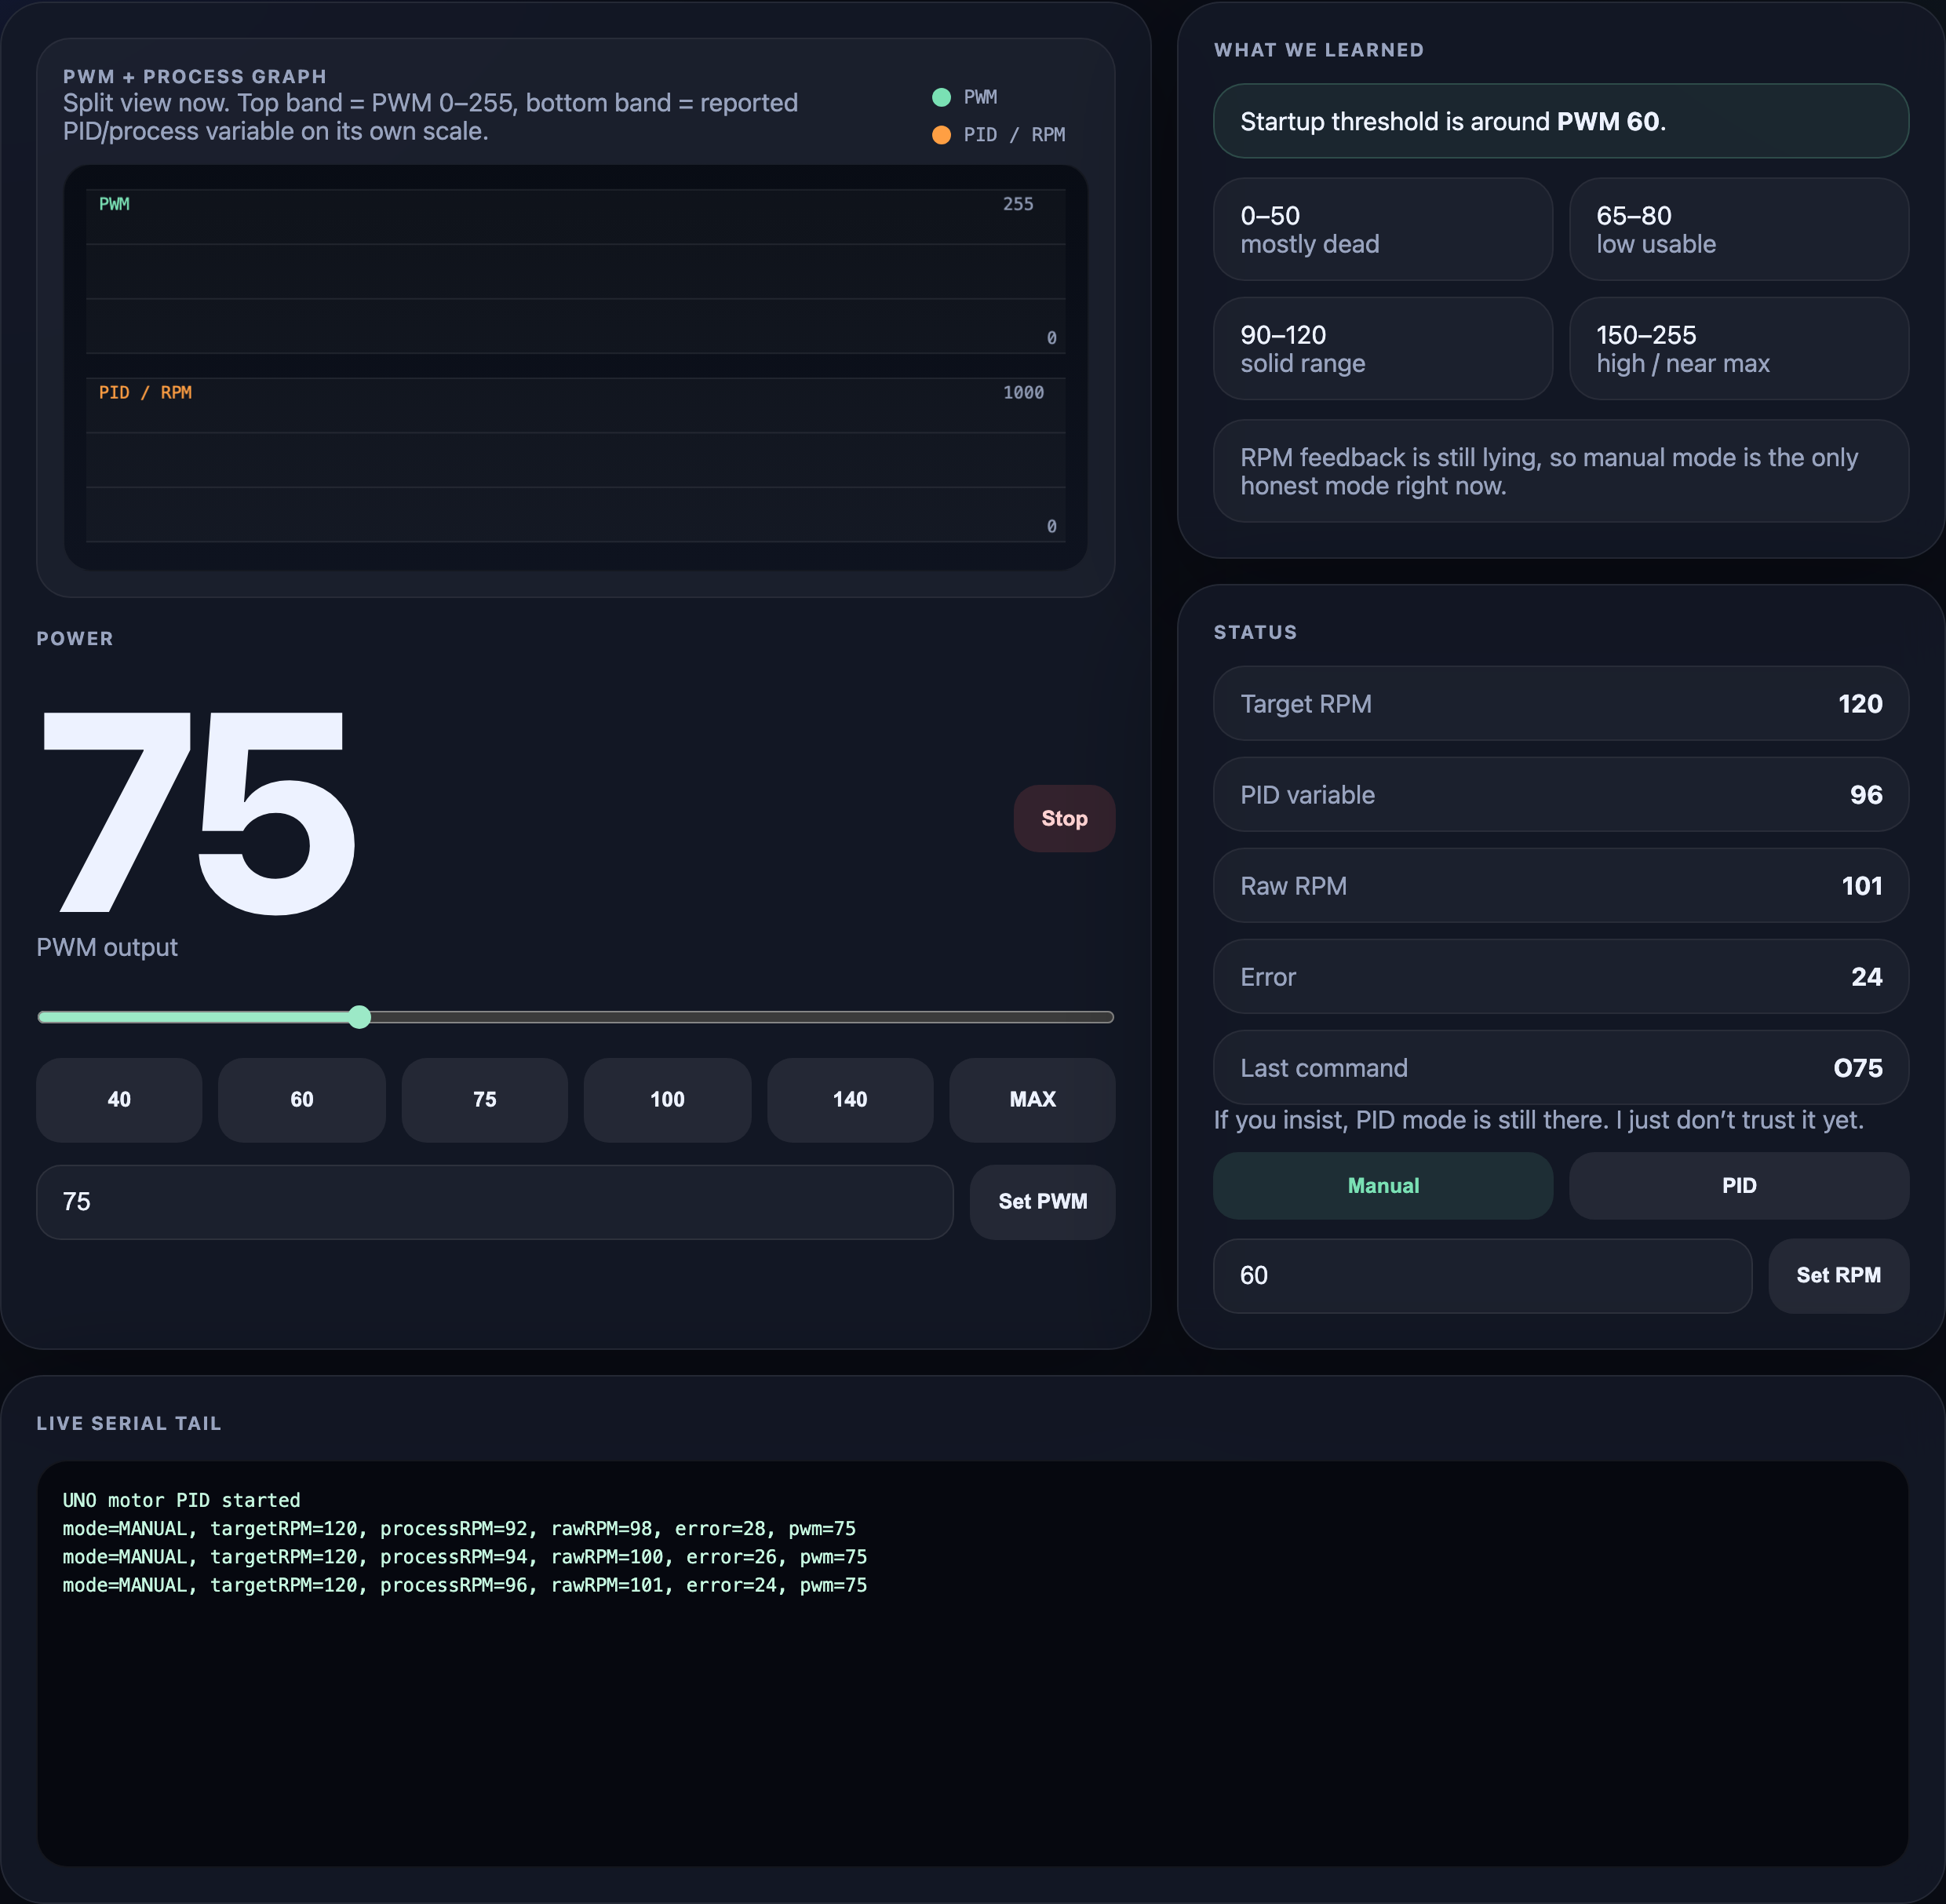
The local control panel we built around the project: manual-first, graph on top, slider in the middle, and enough live feedback to make testing much less painful.
This is where school projects get interesting
A lot of school work stays trapped in the land of neat diagrams and clean assumptions.
Real projects are not like that.
A cable is wrong. A signal is noisy. A sensor reading looks clever until you realize it is nonsense. Something that should work on paper turns out to need more testing in reality. That is not a problem with the project. That is the project.
That was part of the value here.
Julian was not just dealing with “Arduino code.” He was working across several layers at once:
- electronics — wiring the parts together
- software — writing and uploading the sketch
- measurement — figuring out what the sensor was really telling us
- debugging — finding out why expected behavior and actual behavior were not always the same
- systems thinking — seeing how the UI, serial connection, motor, and sensor all depend on one another
That is much closer to real engineering than just getting one code snippet to compile.
The photo says a lot, actually
The picture from the build is exactly what I like about projects like this.
It is not polished in the fake, over-styled way people sometimes present technical work online. It looks like what it is: a real school project sitting in the middle of being built, tested, and figured out.
And that is a compliment.
A project table with hardware, cables, a board, and things in progress usually means learning is actually happening. That mess is often where the useful part lives.
The honest result: manual mode worked best
This is the part where people usually try to oversell things. I would rather not.
The project worked well in manual PWM control mode.
That is the honest version.
We could control the motor, test ranges, and build a good understanding of where the useful operating window was. On the current setup, the rough behavior looked like this:
- 0–50 → mostly dead or unreliable
- around 60 → startup threshold
- 65–80 → low usable range
- 90–120 → solid normal range
- 150–255 → high / near max
That alone is already useful. It turns guessing into something concrete.
Where things got more complicated was the RPM sensing path.
The sensor data was noisier than we wanted, which meant full closed-loop PID control was more of an experiment than something I would pretend was production-ready. The code handles that reasonably well — it rejects obviously bogus pulse bursts, uses more than one way to estimate RPM, smooths the value, and drops stale readings to zero — but none of that changes the basic truth that noisy hardware input is still noisy hardware input.
That is not failure. It is normal.
If anything, it is one of the better lessons in the whole project: systems are only as trustworthy as the signal they are built on.
What the Arduino is really doing under the hood
The nice thing about this sketch is that it is simple enough to follow, but still real enough to teach good habits.
At a high level, the loop goes like this:
- read any new command from the computer
- wait for the next control interval
- safely copy the latest pulse data
- estimate the current motor speed
- smooth that reading so it is less jumpy
- compare actual speed to target speed
- either:
- use the human-chosen PWM value, or
- calculate a PID output
- send power to the motor
- print status back to the computer
That is the whole control story in plain English.
The board is constantly asking:
- what did the user ask for?
- what is the motor doing now?
- do I trust that reading?
- should the human be in charge, or should auto-control take over?
- what should I send to the motor next?
That is a much more useful way to understand embedded code than staring at a file full of variables and hoping meaning appears.
Why I liked helping with this one
Because it sat in a really good middle ground.
It was still a school project, so it had a clear goal and a natural reason to exist. But it was also real enough that the work mattered. You had to test things. You had to think. You had to make sense of behavior instead of just copying a nice-looking result.
And that is the kind of help I actually enjoy giving.
Not “here is the answer, good luck.”
More like: let’s build something properly, understand what works, be honest about what does not, and come out of it with something you can explain.
That last part matters a lot. A good school project is not just one that runs. It is one you can talk about.
Why this pin? Why this mode? Why does the motor not start at low PWM? Why do sensor readings need smoothing? Why can software be sensible even when hardware is messy?
Those are the kinds of questions that turn a project into actual learning.
The better lesson hiding inside it
I think one of the best things about technical projects for younger people is that they reward curiosity almost immediately.
You change something and the system reacts. You test an idea and reality answers back. Sometimes the answer is useful. Sometimes it is rude. Both are educational.
That is very different from passive learning.
A board, a motor, a sensor, and a bit of code can teach:
- patience
- structured testing
- troubleshooting
- cause and effect
- how software and hardware depend on each other
- how not to panic when something does not work the first time
Those are not small things.
Final thought
For Julian, this was a school project.
But the better version of the story is that it became a real little build: part code, part electronics, part debugging session, and part lesson in how technology behaves once it leaves the clean world of theory.
I loved helping with that.
If you are curious about the code, wiring approach, and the local control setup behind it, you can also browse the project here:
Because when a project gets to the point where you can see it, test it, argue with it, and improve it, it stops being just an assignment.
It becomes real.